How to Use a Wax Seal Stamp

Learn how to use a wax seal stamp with wax beads, a melting spoon, or a glue gun. Follow our step-by-step guide for letters, clean impressions, and mailing tips.
A Beginner's Guide to Making Beautiful Wax Seals
A wax seal adds a personal finishing touch to letters, wedding invitations, gifts, and stationery. Whether you are using wax beads, a melting spoon, or a compatible wax stick, the process is easy to learn with a little practice.
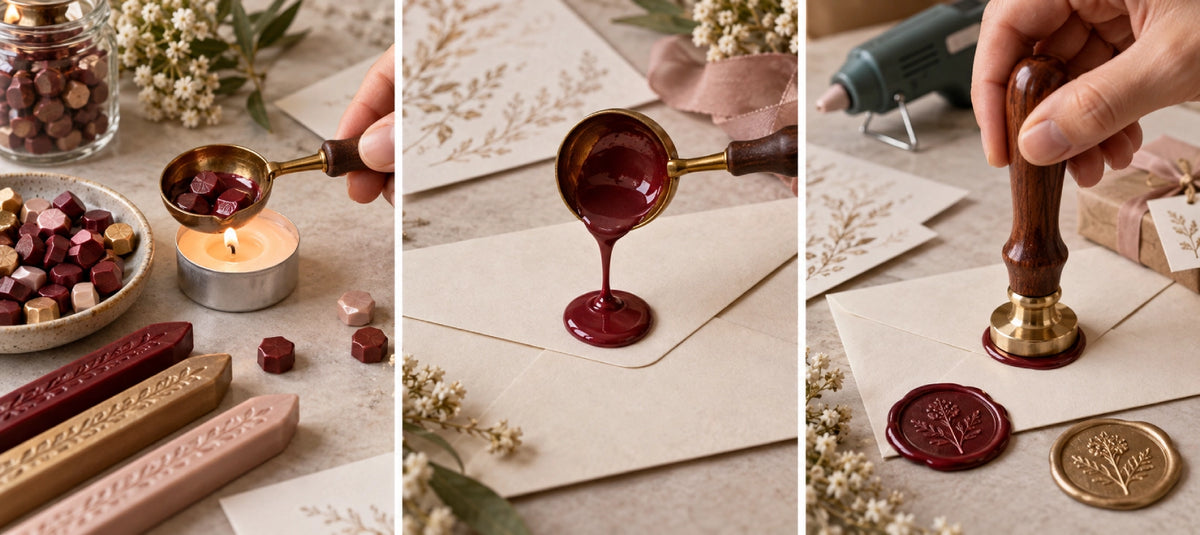
To use a wax seal stamp, melt a small amount of sealing wax, pour it onto your chosen surface, press the stamp evenly into the warm wax, and let it cool before lifting the stamp away. This guide walks you through each step, with practical tips for clean impressions and mailing wax-sealed letters.
What Is a Wax Seal Stamp and How Does It Work?
A wax seal adds a personal finishing touch to letters, wedding invitations, gifts, and stationery. Whether you are using a traditional melting spoon or a modern wax seal stamp kit, the process is simple once you understand how the wax behaves.
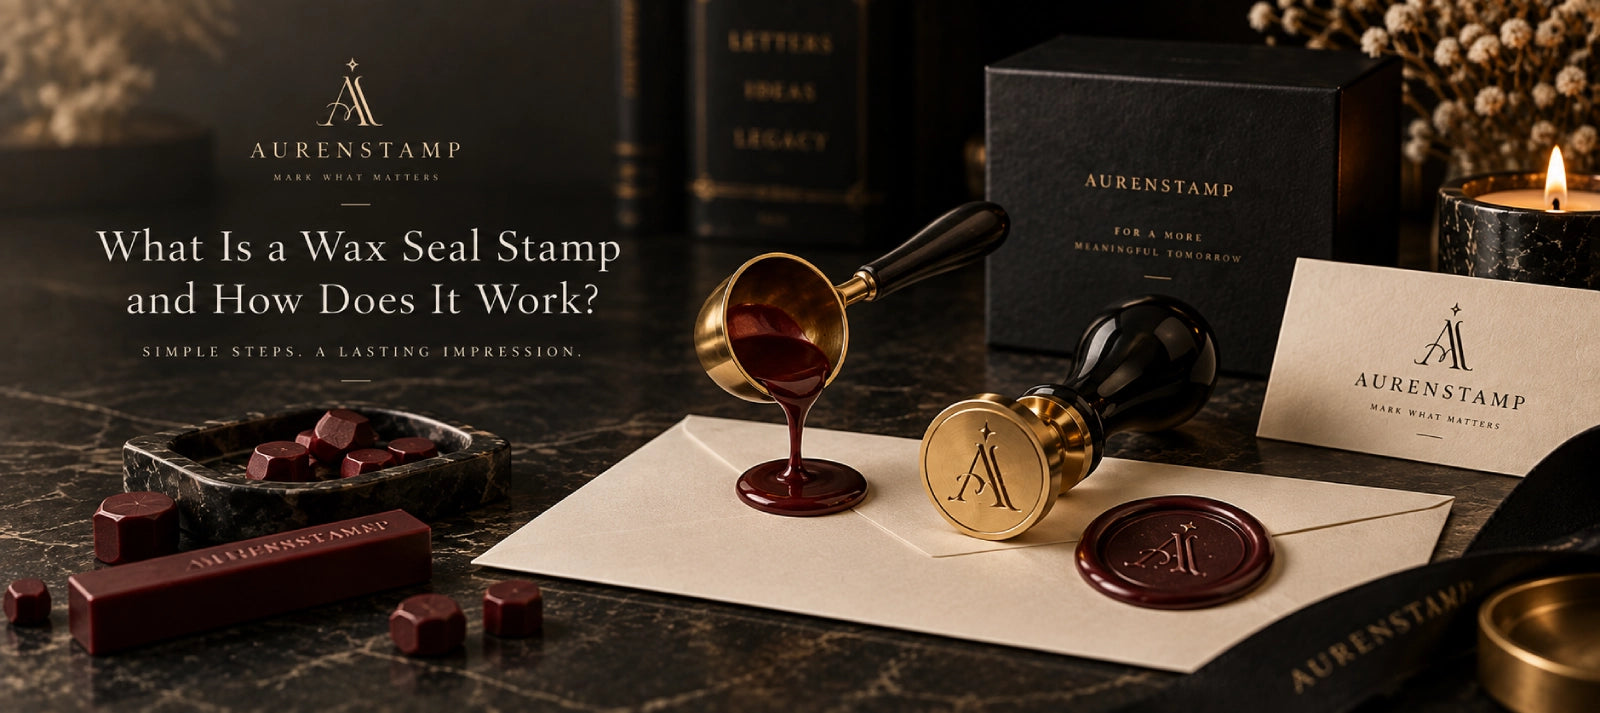
To use a wax seal stamp, melt a small amount of sealing wax, pour it onto your chosen surface, press the stamp evenly into the warm wax, and allow it to cool before lifting the stamp away. The key is to use enough wax, avoid overheating it, and keep the stamp still while the impression sets.
This guide explains each step in detail, including how to use wax beads, wax sticks, and glue-gun sealing wax, plus practical advice for creating seals on letters and preparing them for mailing.
What Do You Need to Use a Wax Seal Stamp?
A wax seal stamp is a reusable tool with an engraved metal head and a handle. When pressed into warm sealing wax, it creates a decorative impression that becomes firm as the wax cools.
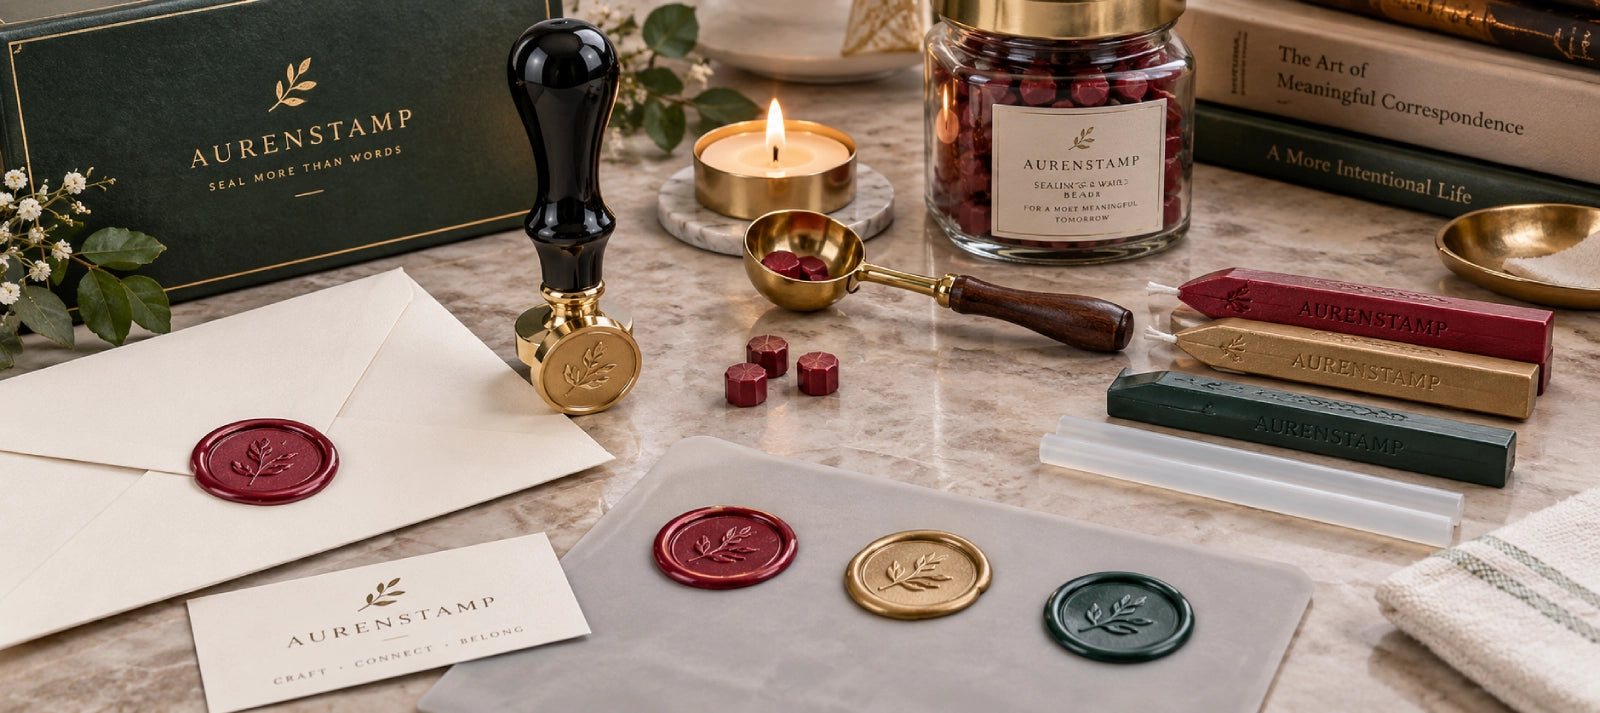
The design is recessed into the metal head. Soft wax fills those engraved areas, producing a raised design on the finished seal. The stamp is the tool you use repeatedly; the wax seal is the impression left behind.
Today, wax seals are used for everything from personal correspondence to wedding stationery and branded packaging. A custom design can turn a simple letter or gift into something distinctly yours.
Explore our custom wax seal stamps to see how initials, logos, and personal artwork can become a reusable stamp.
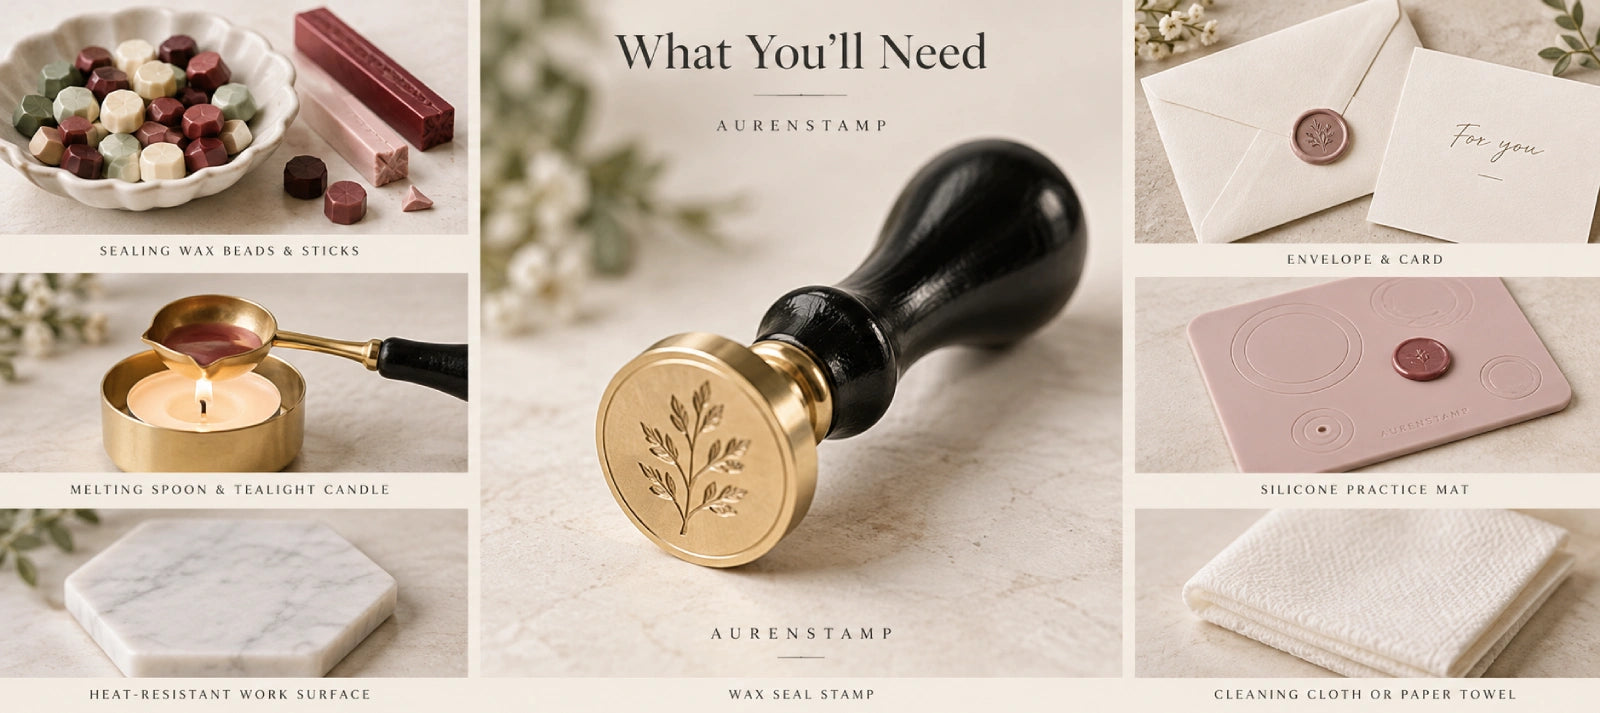
What You'll Need
You do not need a complicated setup. For the traditional spoon method, prepare:
- A wax seal stamp
- Sealing wax beads or pieces of a wax stick
- A melting spoon and tealight candle
- A stable, heat-resistant work surface
- An envelope, card, or silicone practice mat
- A soft cloth or paper towel for cleaning
A basic wax seal stamp kit may include some of these items, while other tools can be purchased separately. Check what is included before beginning.
Choosing Wax and the Right Amount
Sealing wax comes in beads, wickless sticks, wicked sticks, and glue-gun-compatible sticks. Beads are convenient for small projects and mixing colors; compatible glue-gun wax is useful when preparing many seals.
For a small stamp, three to four average-sized wax beads are a practical starting point. Larger heads require more wax, and the exact amount varies with bead size and wax formulation. Make one test impression and adjust until the wax forms a visible border around the design.
If you plan to mail your finished envelopes, choose a wax specifically described by its manufacturer as flexible or suitable for mailing. Traditional brittle wax may crack when bent.
How to Use a Wax Seal Stamp with Wax Beads
The melting spoon method gives you control over the amount and placement of wax. Follow these five steps to create your first impression.
Step 1: Prepare Your Workspace and Melt the Wax
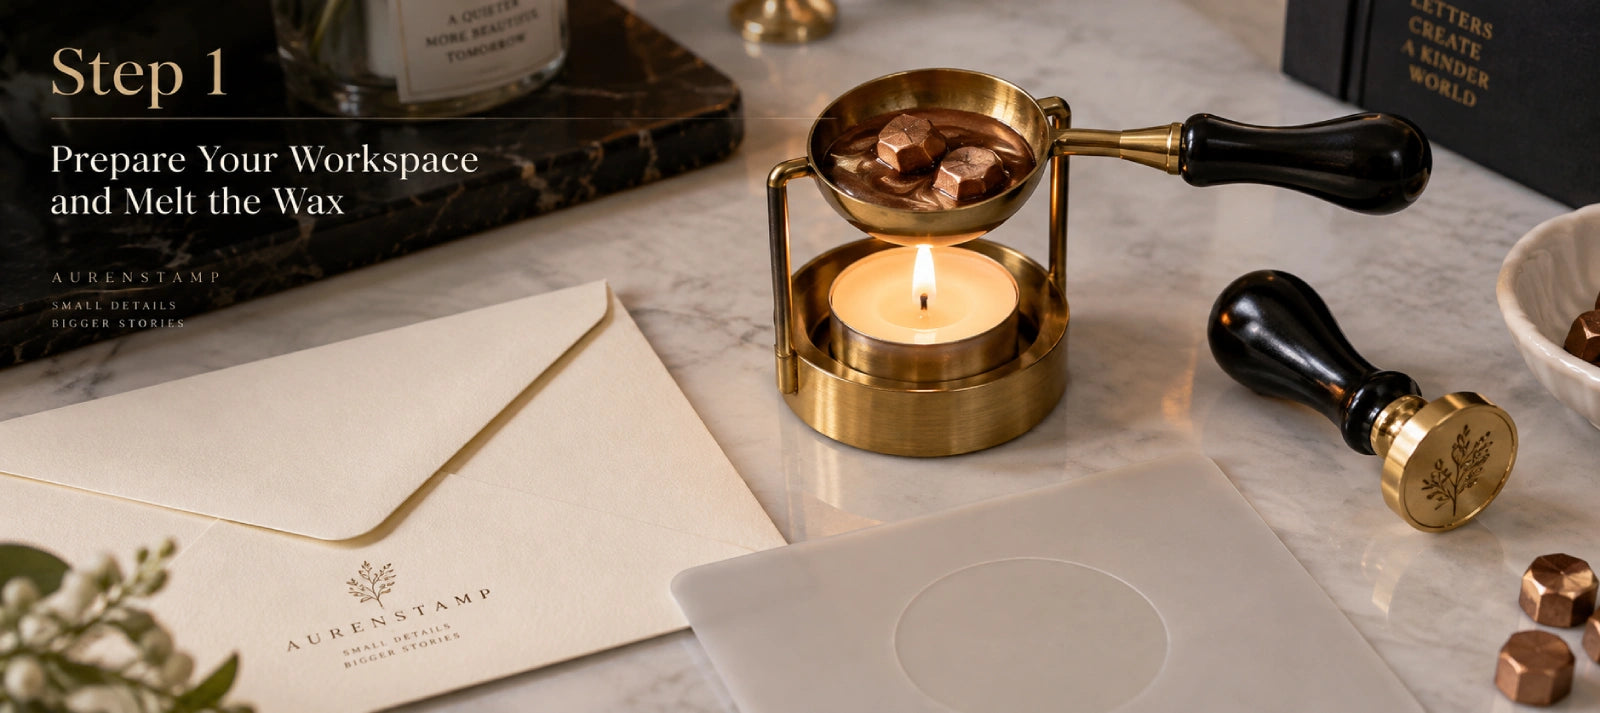
Place the candle on a stable, heat-resistant surface, away from loose paper, fabric, and other flammable materials. Keep your envelope or practice mat nearby.
Add approximately three to four wax beads to the spoon, adjusting the quantity for your stamp size. Hold the spoon by its heat-safe handle or place it in a suitable holder above the tealight. Allow the wax to melt gradually until it flows smoothly.
If the wax begins to smoke or bubble excessively, remove it from the heat and let it cool slightly. Avoid overheating it, and never leave a lit candle or hot spoon unattended.
Beginner tip: Melt one small batch at a time until you become familiar with your wax's melting and setting behavior.
Step 2: Pour a Controlled Puddle
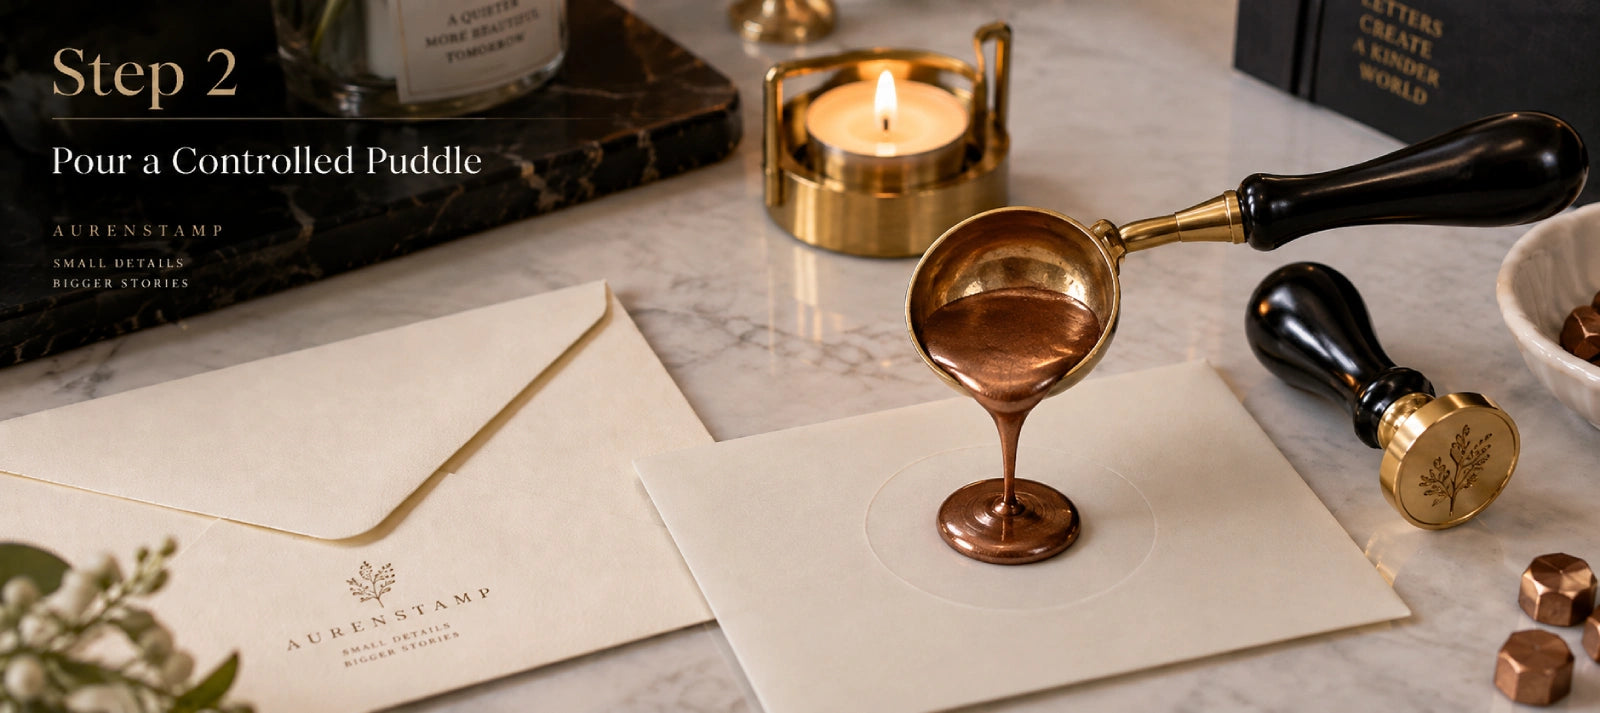
Bring the spoon close to the surface and pour the melted wax slowly into one central spot. Aim for a puddle slightly smaller than the stamp head; the pressure of the stamp will spread the wax outward.
Keep the surface level and avoid moving the spoon widely around the paper. A slightly irregular edge is perfectly acceptable if you prefer a traditional, organic appearance.
If the wax spreads too far, use a little less or allow it to cool slightly before pouring. If the finished seal has gaps or almost no border, increase the amount of wax.
Step 3: Position and Press the Stamp
Check that your design is facing the correct direction, especially if it contains initials, names, or a logo.
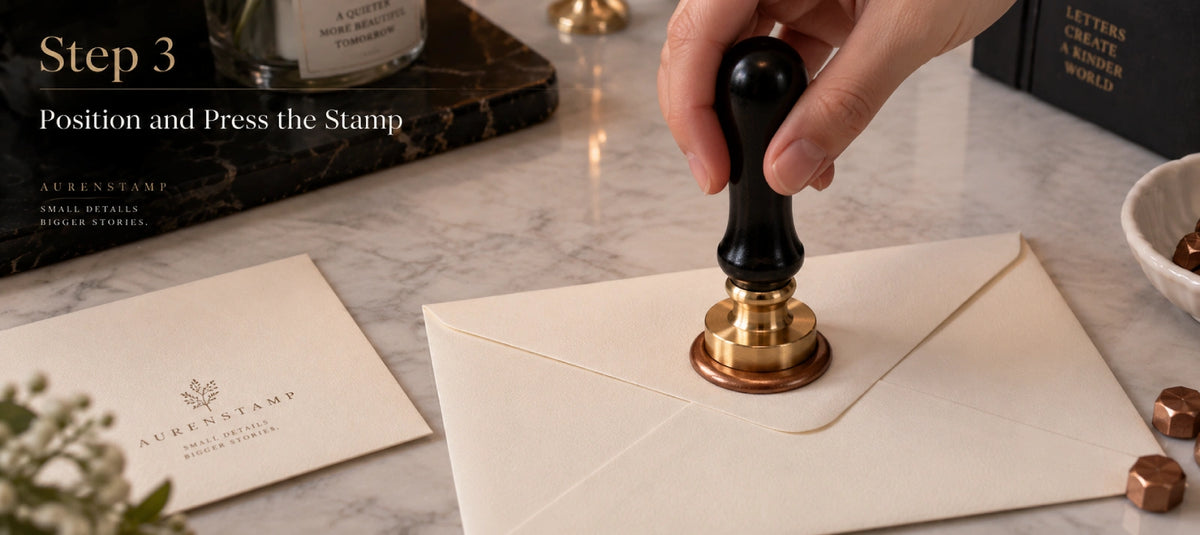
Hold the handle upright and center the metal head over the warm wax. Lower it straight down with firm, even pressure. Do not rock, twist, or tilt the stamp, as this can distort the impression or create an uneven border.
You do not need to force the stamp into the paper. Once it is in place, keep it completely still while the wax begins to set.
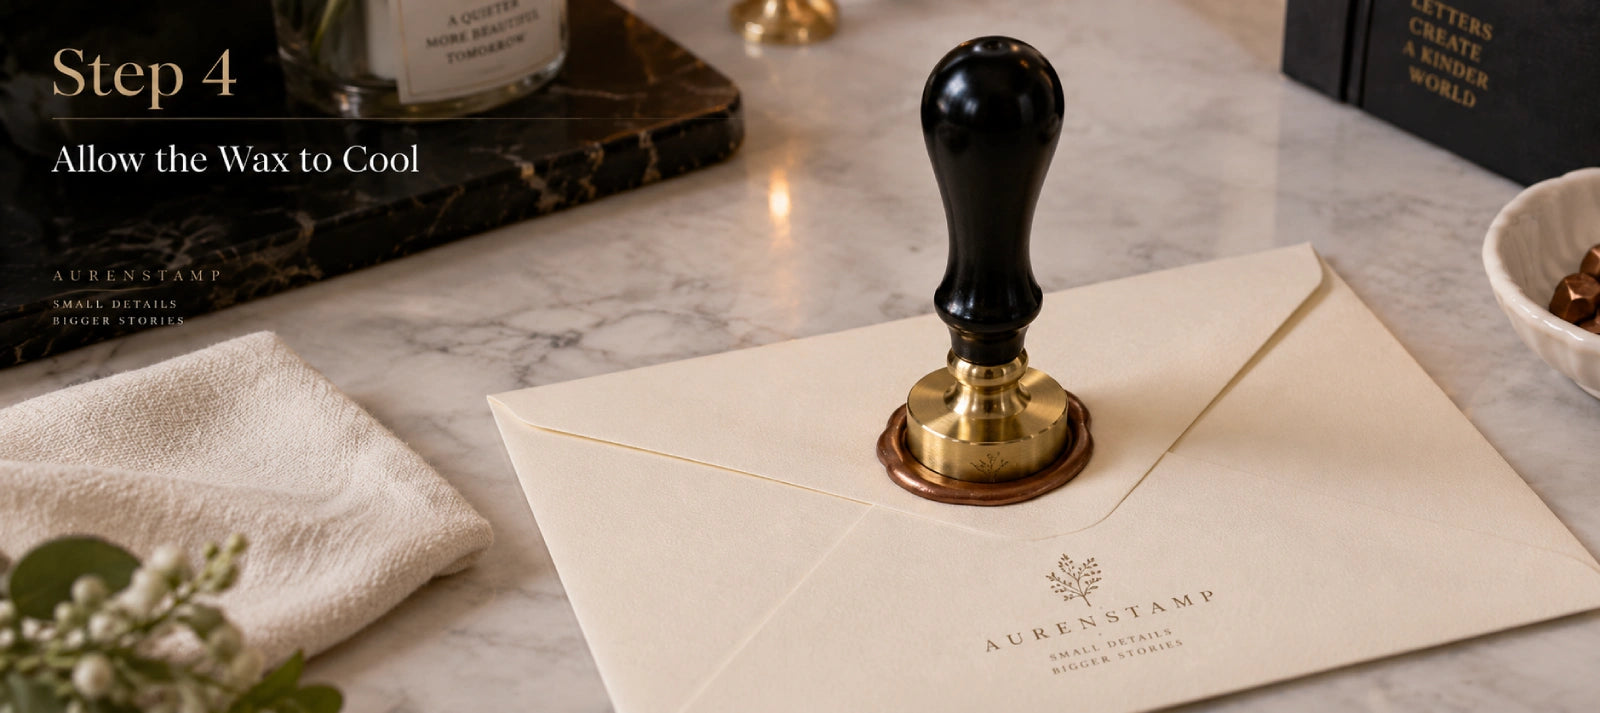
Step 4: Allow the Wax to Cool
Leave the stamp undisturbed while the wax cools. A small seal may be ready after roughly 15–30 seconds, but some waxes take longer depending on the formulation, quantity, stamp temperature, and room conditions.
Do not treat the timer as a strict rule. If the wax still feels soft or the stamp resists, allow more time.
For repeated stamping, a cool metal head can help with clean release. If you use a cold pack to cool the head, dry it completely before stamping and avoid exposing wooden handles to moisture or extreme temperature changes.
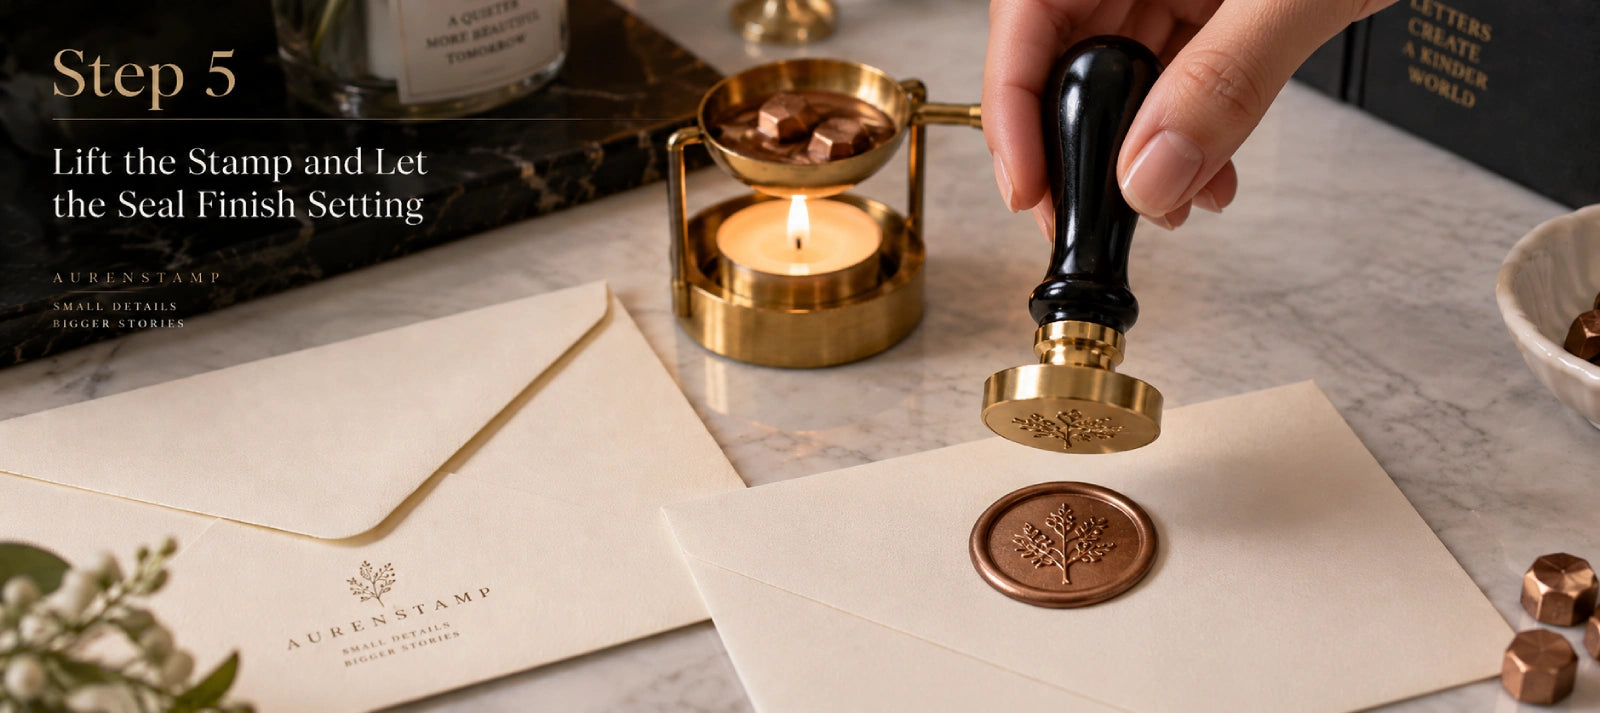
Step 5: Lift the Stamp and Let the Seal Finish Setting
Once the wax has firmed up, lift the stamp gently and straight up. Avoid twisting or peeling it sideways.
If the stamp feels stuck, wait a little longer rather than pulling forcefully. Lifting too early may stretch the wax or blur the design.
Leave the finished impression undisturbed until fully firm before stacking stationery or placing it into packaging. Your first seal does not need to be perfect—a few practice impressions will help you find the right amount of wax and cooling time.
Other Ways to Melt Sealing Wax
The stamping technique is essentially the same whether you use beads, a wax stamp set, or another compatible wax format. The main difference is how the wax is melted and applied.
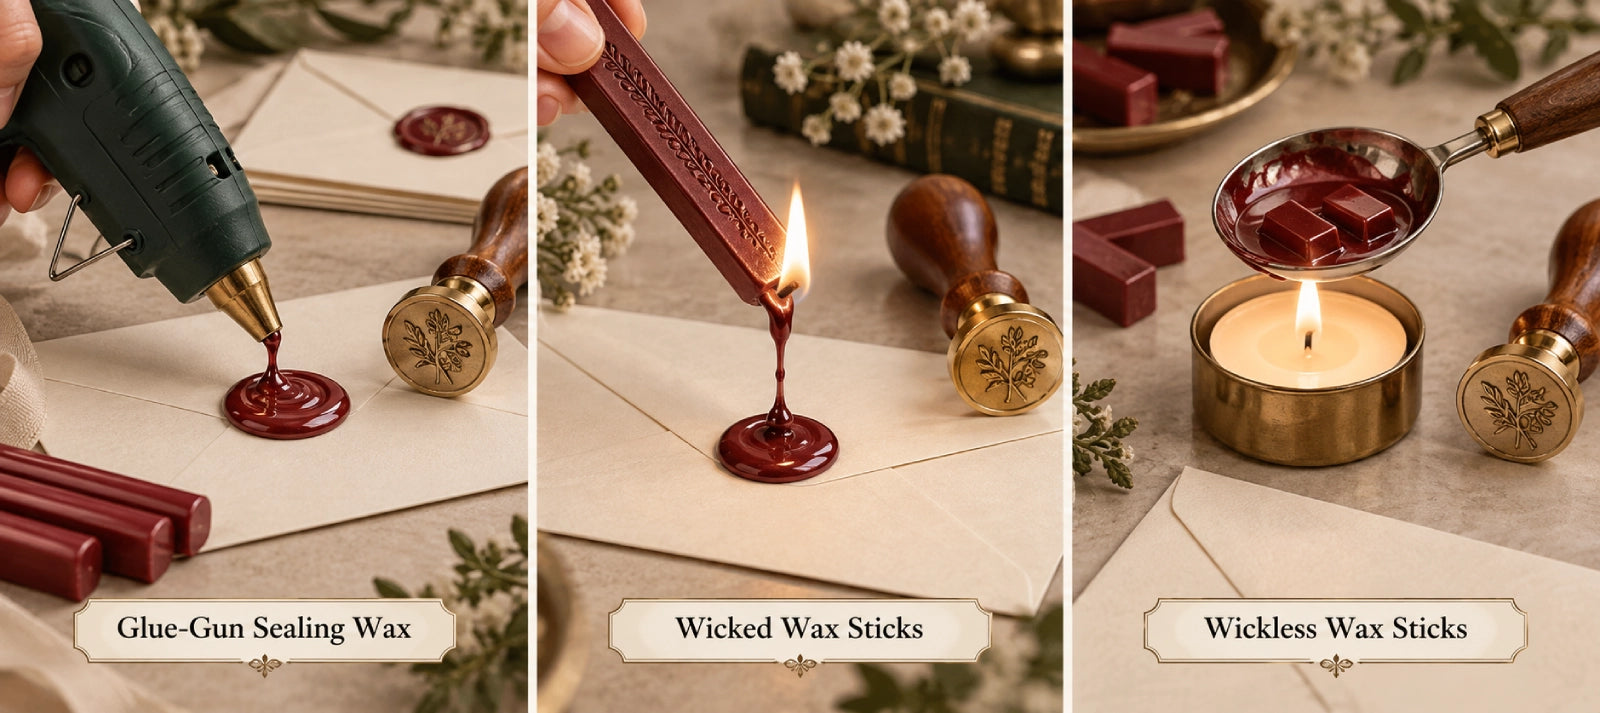
Glue-Gun Sealing Wax
A glue gun can be useful when preparing a large batch of invitations. Use only sealing wax sticks designed for your specific glue gun, and follow the manufacturer's temperature and size requirements.
Allow the gun to reach its recommended operating temperature, dispense a small puddle, and press the stamp into the warm wax. Let the impression set before lifting the stamp. Ordinary craft glue and sealing wax are not automatically interchangeable.
Wicked Wax Sticks
A wicked wax stick can be lit directly and allowed to drip onto the project. Once you have enough wax, extinguish the flame safely and press the stamp into the puddle.
This traditional method can be less predictable than a spoon. Take care to keep soot, wick fragments, and burning debris out of the wax.
Wickless Wax Sticks
Cut a suitable wickless stick into smaller pieces and melt them in a spoon. This provides the control of the spoon method without requiring wax beads.
For additional guidance on different wax formulations and heating methods, see LetterSeals' sealing wax instructions.
How to Use a Wax Seal Stamp for Letters
Wax seals are especially popular for personal letters, wedding invitations, thank-you notes, and formal correspondence. The technique is the same as practicing on a mat, but placement and mailing conditions deserve extra attention.
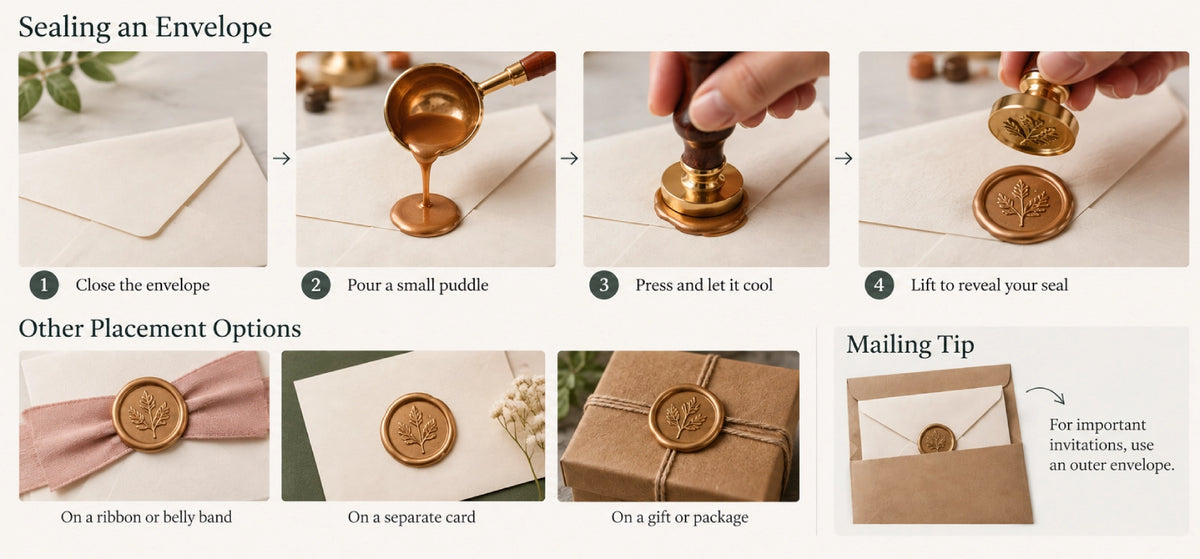
Sealing an Envelope
Close the envelope flap and place it on a firm, level surface. Pour a small puddle over the point where the flap meets the envelope body, then press the stamp evenly and let the wax cool.
For decorative stationery, you can also apply a seal to a belly band, ribbon, or separate card. Test delicate or coated materials first, as wax may adhere differently to different surfaces.
Can You Mail a Letter with a Wax Seal?
Yes, but an exposed wax seal may be damaged during postal processing. A thick, rigid, or uneven seal can also affect postage or handling requirements.
For important invitations, the safest practical approach is to place the decorated envelope inside a second, plain outer envelope. This protects the seal and creates a smoother exterior for mailing.
If you prefer to mail the sealed envelope directly, use mailing-suitable wax, keep the seal reasonably thin, and check with your postal carrier. In the United States, USPS recommends protecting embellished envelopes inside another envelope and provides specific guidance on nonmachinable mail.
Before sending a large batch, allow the seals to cool completely, check the finished thickness and weight, and consider mailing one test invitation. You can review the USPS guide to mailing letters and embellished invitations for current requirements.
Troubleshooting & Frequently Asked Questions
Why does my stamp stick to the wax?
The wax may still be warm, or the stamp may have become too hot after repeated use. Wait a little longer and lift gently. Keep the engraved face clean and allow the metal head to cool between impressions.
Why is my wax seal blurry or incomplete?
Check that the wax is soft enough to receive the impression and that the stamp is pressed evenly. Too little wax can create gaps, while rocking the stamp may distort the design. Fine artwork may also require more careful preparation than a design with stronger lines.
Can I use ordinary candle wax?
Ordinary candle wax is not formulated to perform like sealing wax. It may be too brittle, too soft, or unable to hold a detailed impression reliably. Use wax specifically intended for sealing.
Can I make wax seals ahead of time?
Yes. You can create separate impressions on a suitable non-stick surface, allow them to cool, and attach them to your project later using an appropriate adhesive. This can be useful for preparing large quantities of stationery.
How do I clean my wax seal stamp and spoon?
Allow the stamp to cool, then gently remove any wax residue from the metal head with a soft cloth. Avoid scraping the engraving with sharp tools.
Clean the melting spoon while it is still slightly warm, using suitable heat protection and following the manufacturer's instructions. Store the stamp in a dry place and protect the engraved face from scratches.
Make Your Own Impression
Once you understand the basics, wax sealing becomes a simple way to add personality to everyday correspondence and special occasions. Experiment with different wax colors, paper textures, and designs to discover the style that feels right for you.
Whether you prefer a classic initial, a wedding monogram, or a business logo, a reusable stamp lets you bring the same personal mark to letters, invitations, gifts, and packaging.
Explore AURENSTAMP's custom wax seal stamps and create a design that is uniquely yours.